You've got an SVG dieline and you need to see it folded in 3D, fast. This tutorial walks you through MockFold's full flow: drop in your dieline, pick a bottom panel to pin to the ground, fold it, wrap your artwork, export the mockup.
Need to take it further? MockFold exports MP4 / WebM clips of the fold animation for social and pitch decks, plus GLB, glTF, and OBJ so the folded box drops cleanly into Blender, Cinema 4D, Maya, or any AR pipeline.
Step · 01
Open the editor
Click Open the editor below or hit mockfold.com/editor directly. Upload your own SVG or download it from the above link (see note)
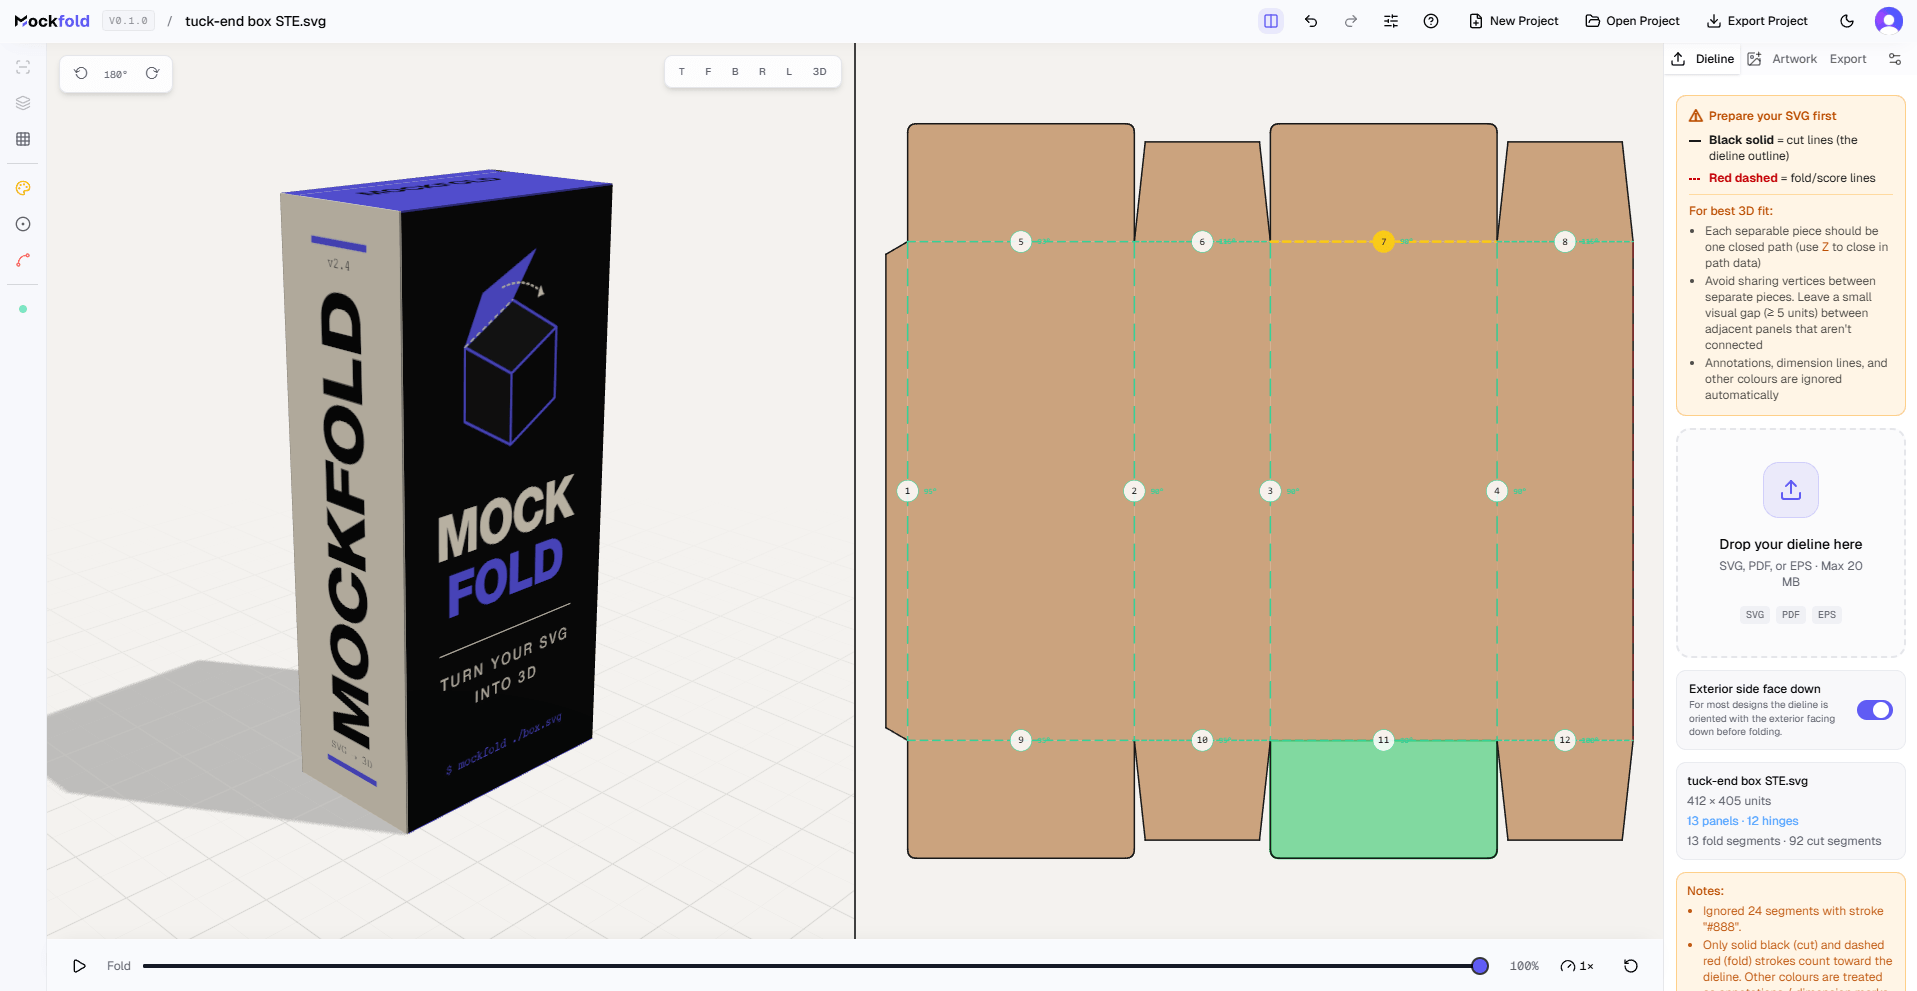
The editor is split into four areas:
- Center: two viewports side-by-side, the flat 2D dieline on the right and the 3D preview on the left.
- Right sidebar: the properties panel with four tabs across the top: Dieline (upload + SVG prep), Artwork (exterior + interior images), Export (output formats), and Settings (material, folding setup, keyframes).
- Bottom: the fold controls strip with a slider, play, and reset.
- Left edge: a thin tool strip for visibility toggles (fold lines, cut lines, grid) and presentation modes (panel colour, shadow, edge colour). These are Pro-gated.
Step · 02
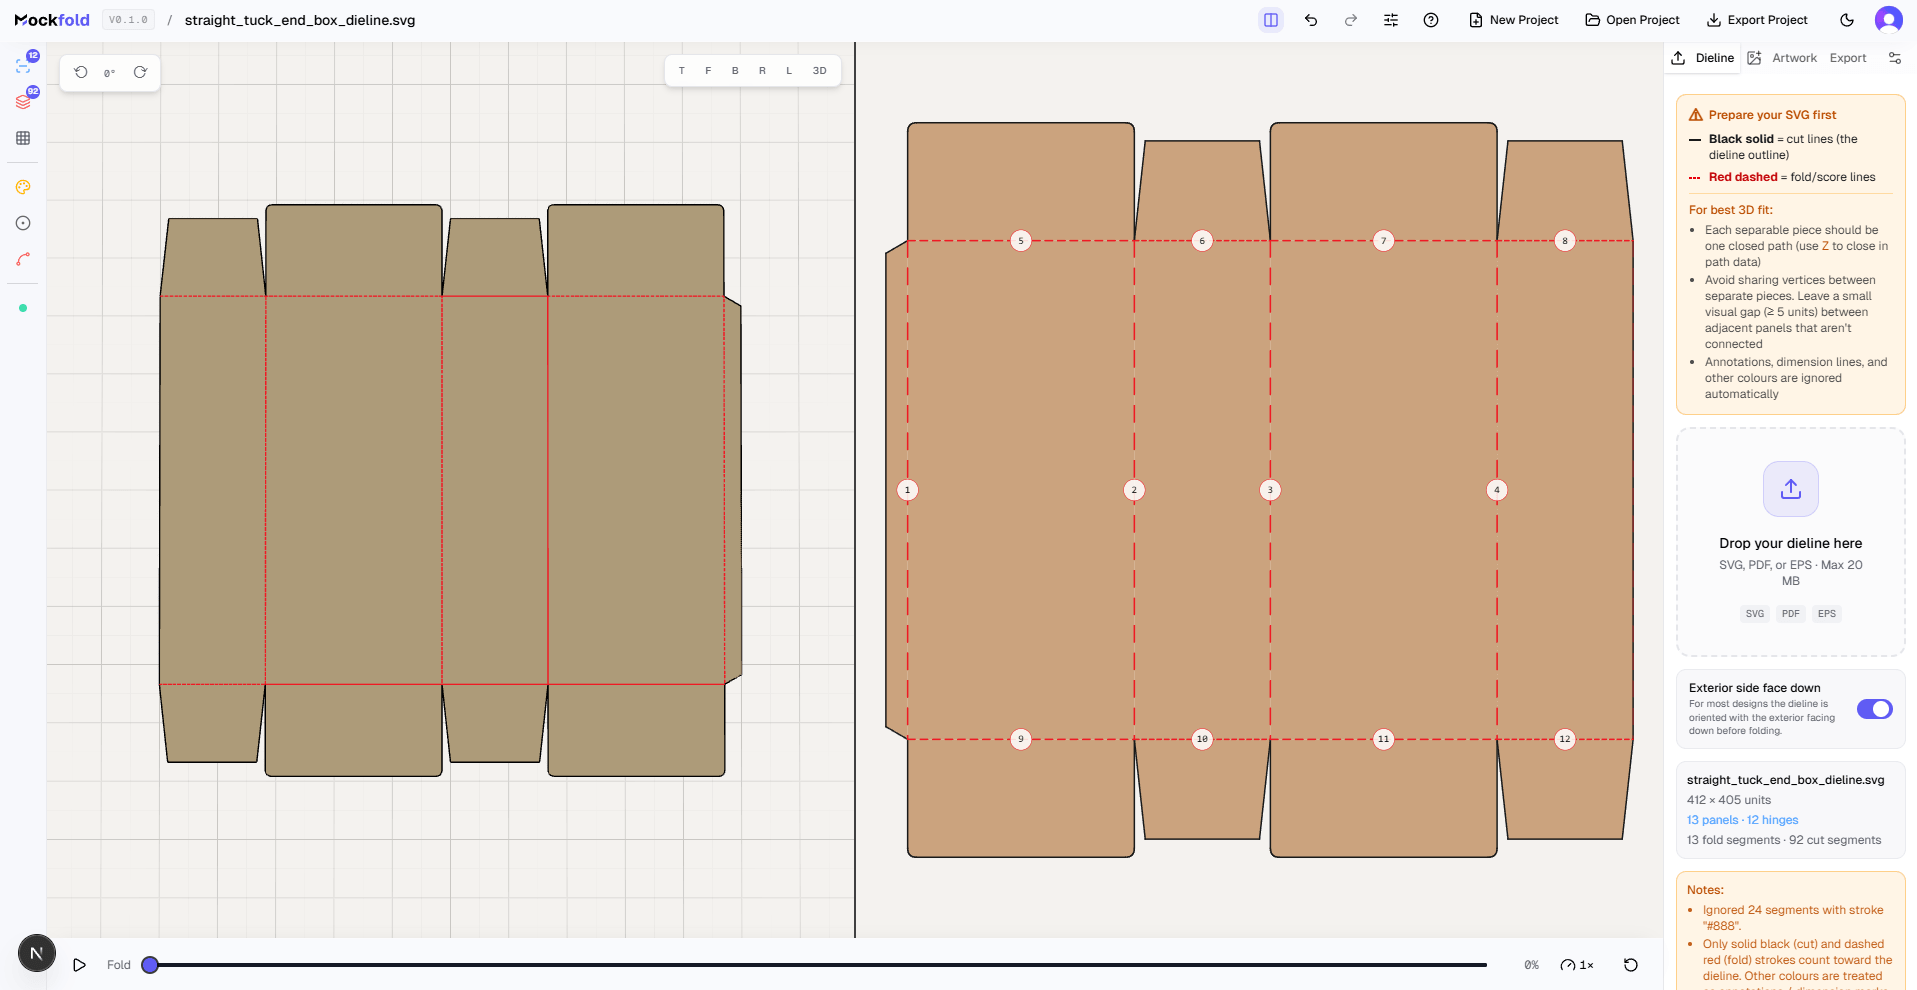
Read the dieline test
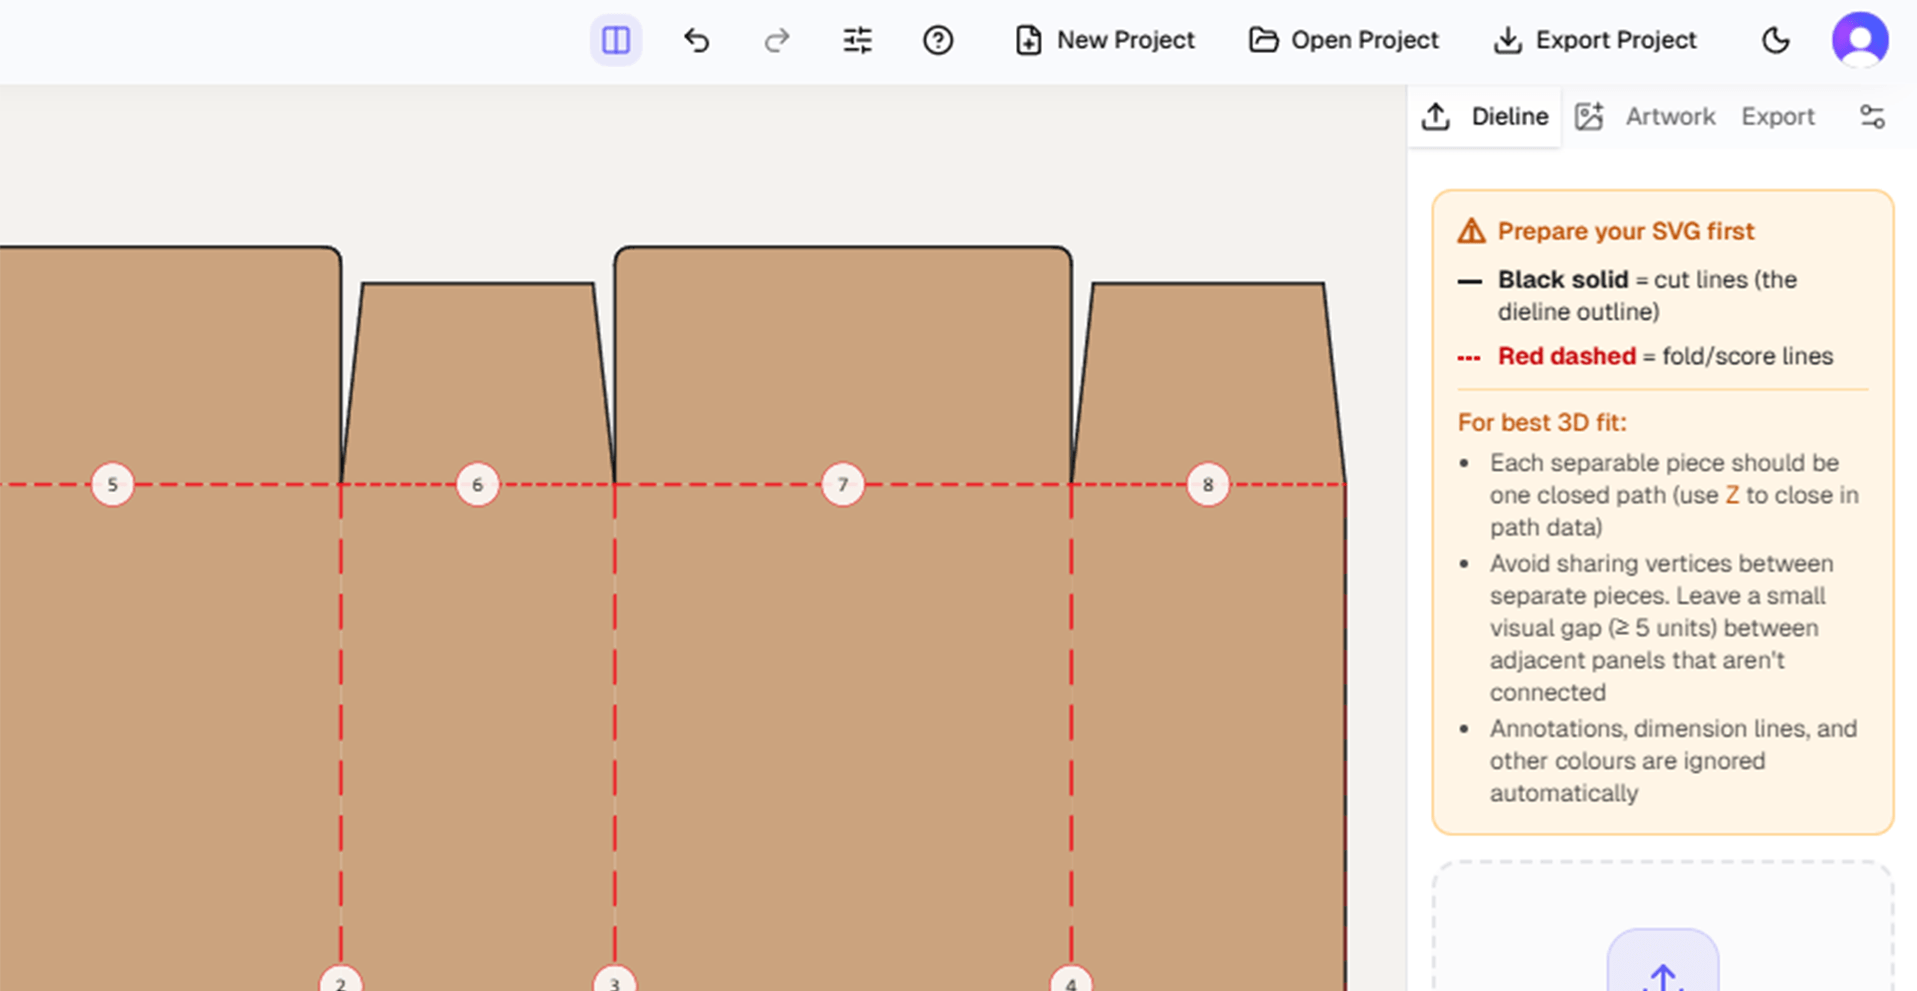
A dieline is the flat 2D blueprint of a box before it's folded. MockFold reads two stroke types in your SVG to know where to cut and where to fold:
- Solid black lines are cuts, the places where the cardboard gets cut by the die.
- Red dashed lines are folds, the places where the cardboard creases.
The editor auto-detects these by stroke colour and dash pattern. You can see them highlighted in the badge counts on the left tool strip.
Step · 03
Pin the bottom panel and fold
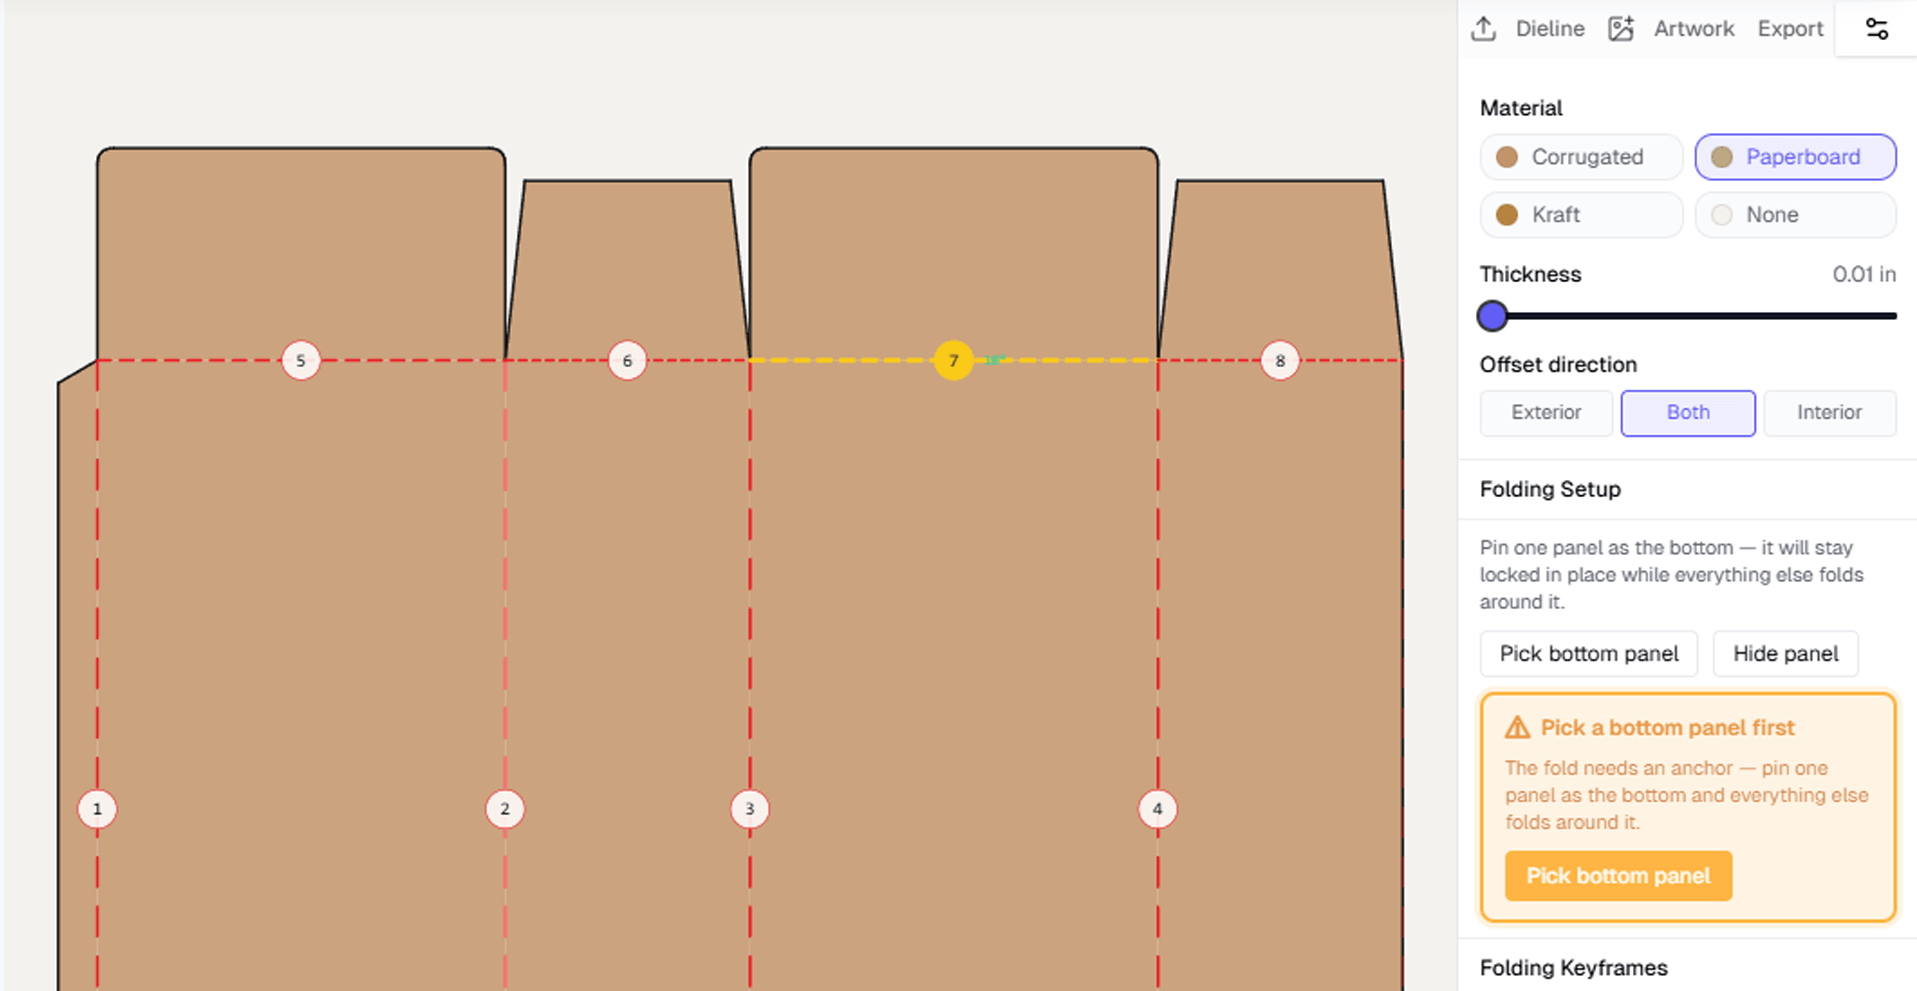
Before MockFold can fold anything, it needs to know which panel stays flat. That panel is the bottom, and every other panel folds around it.
- Open the Settings tab in the right sidebar (the control icon).
- Under Folding Setup, click Pick bottom panel. The 2D view becomes click-aware.
- Click the panel in the 2D dieline that should stay flat.
- A green "Bottom panel pinned" indicator appears once it's set.
With a bottom panel pinned, drag the fold slider which can be found under the bottom pannel section from 0% to 100%. The 3D preview animates from flat to fully folded as you scrub. Hit Play to watch the fold play through automatically, or Reset to snap back to flat.
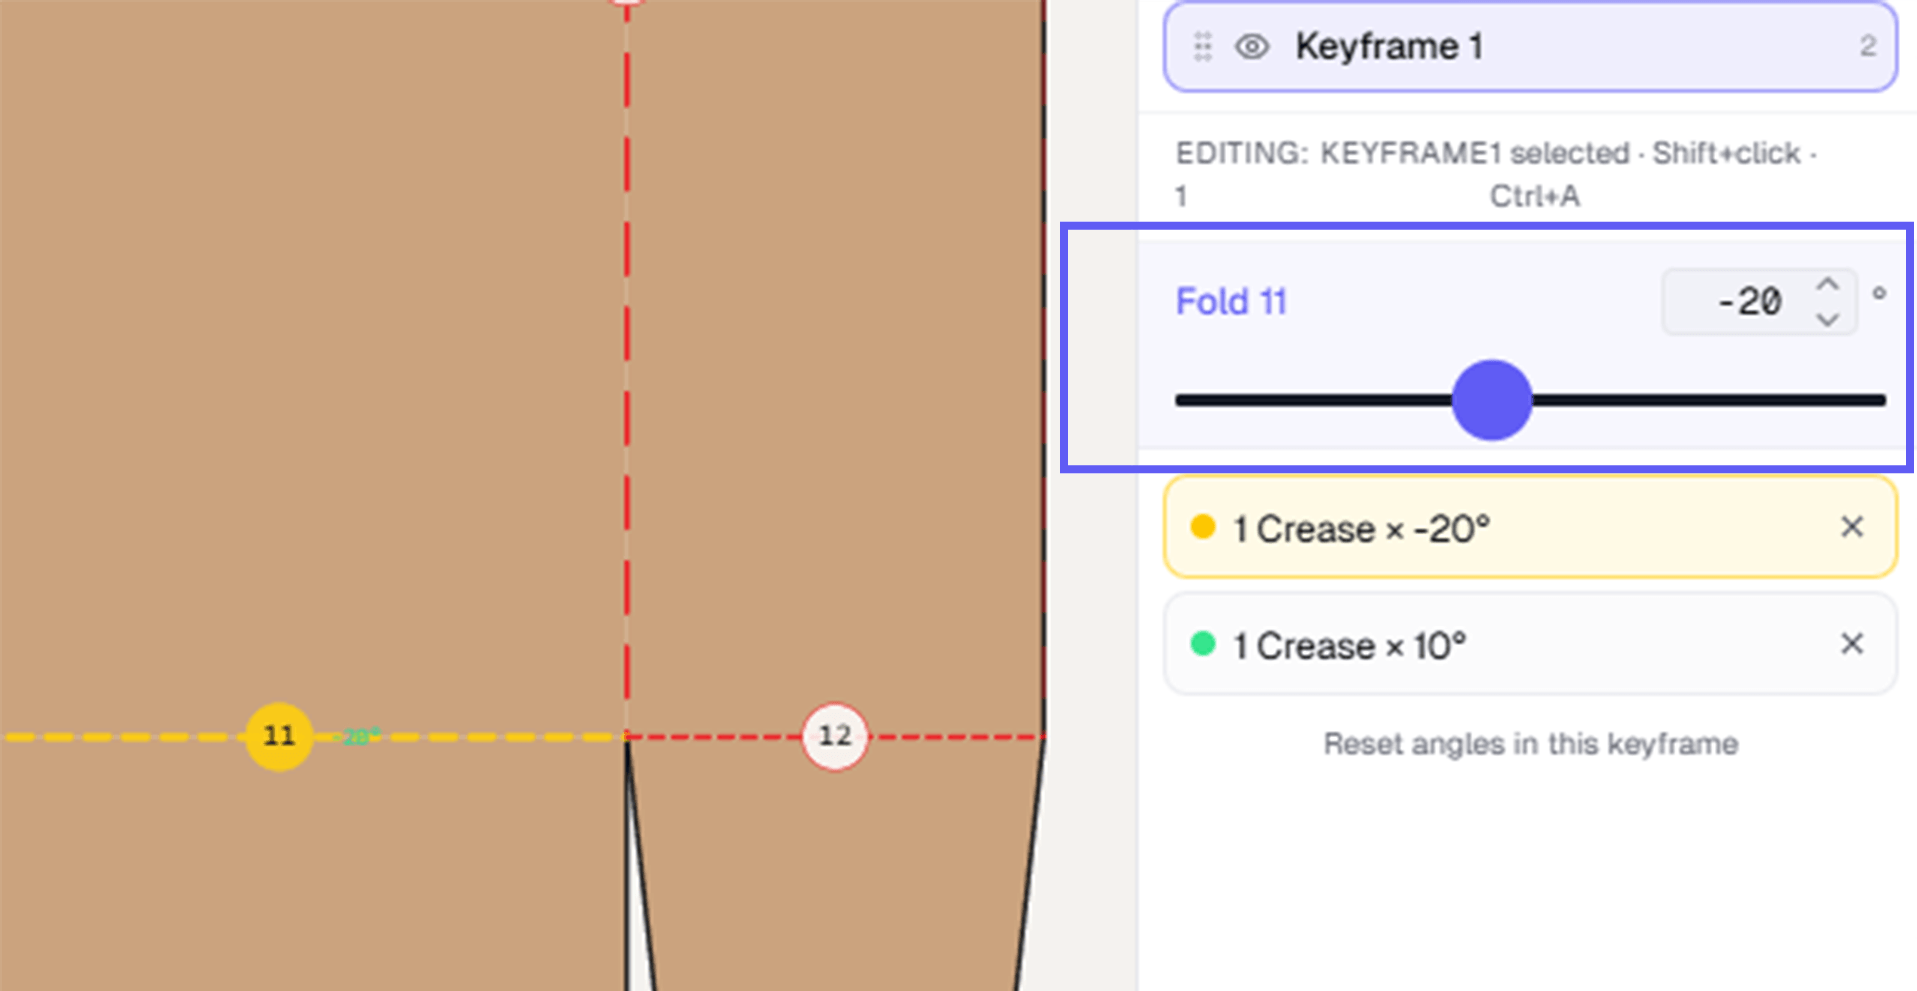
You can also save keyframes under Folding Setup to capture specific fold poses (flat, half-folded, fully folded) and animate between them. If you just want a quick fold animation video, skip the keyframes, the MP4 / WebM export in Step 7 records the slider sweep automatically.
Step · 04
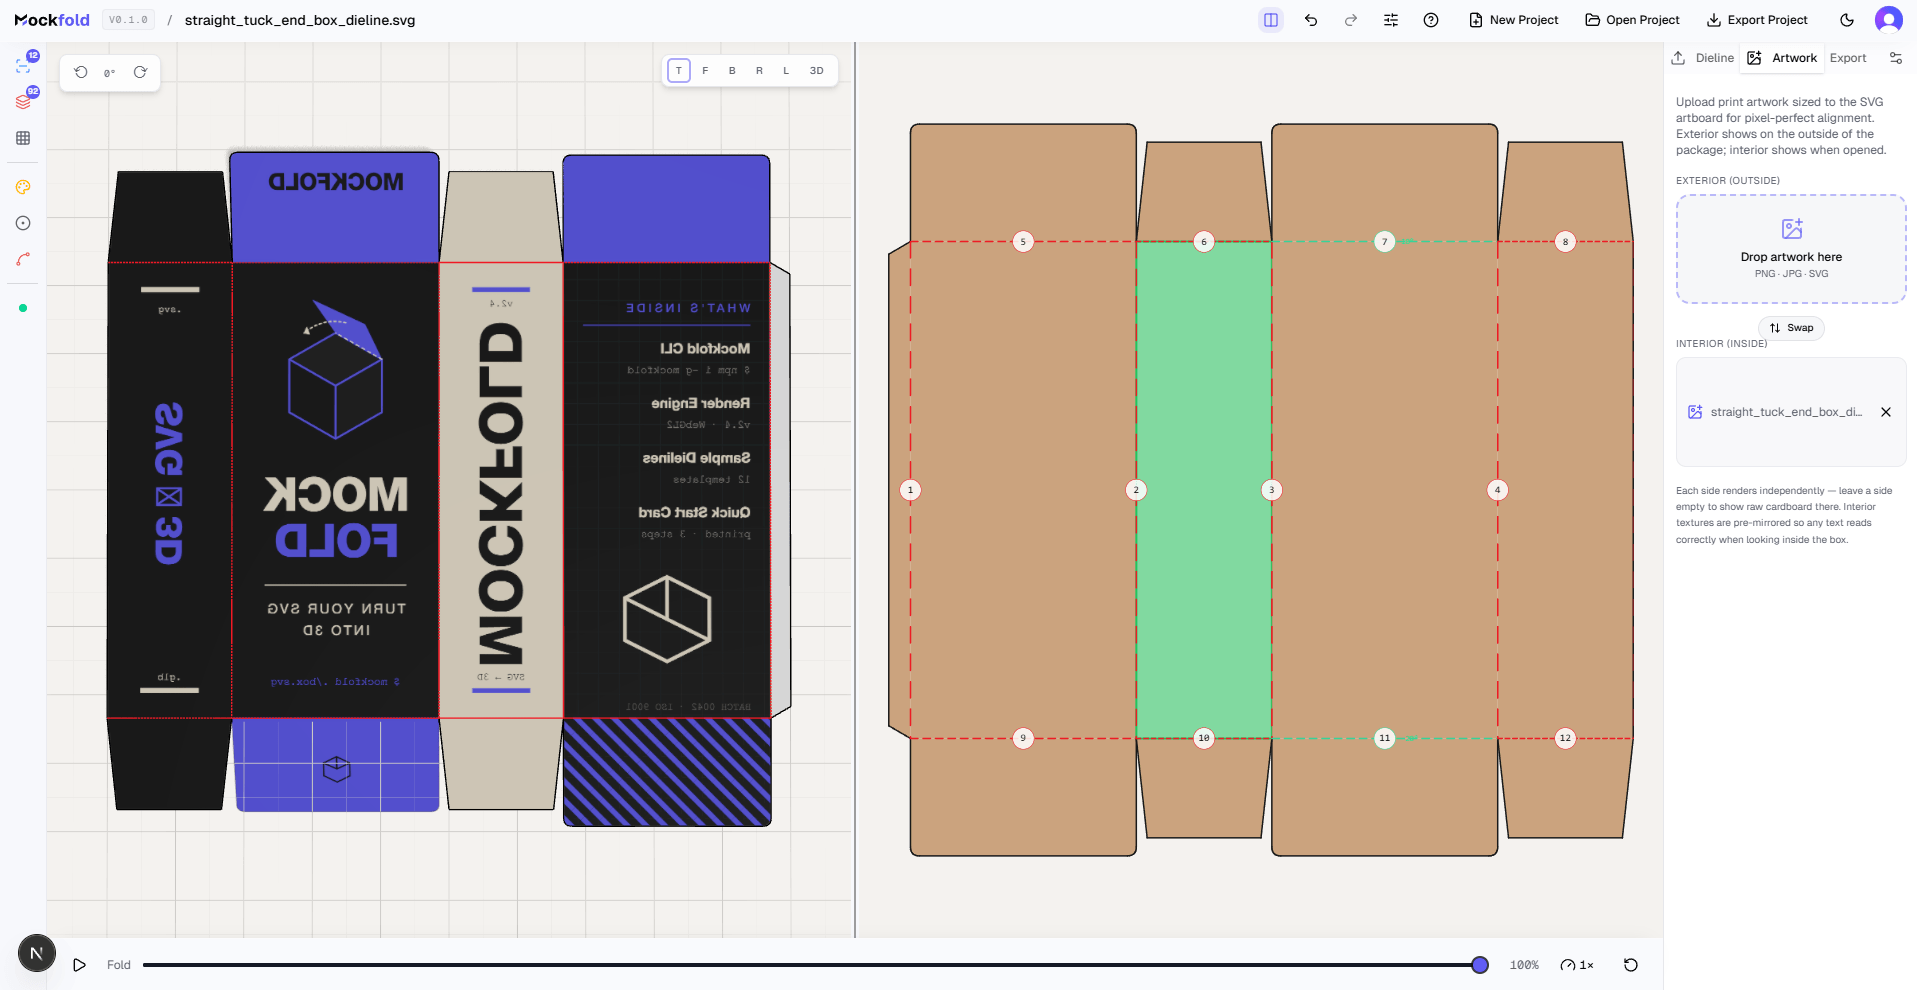
Wrap your artwork
Open the Artwork tab in the right sidebar. There are two upload slots:
- Exterior is the printed outside of the box, the side a customer sees.
- Interior is what shows when the box is opened.
Drop a PNG or JPG into either slot (or both). The image gets mapped onto the dieline using the SVG's viewBox as the canvas, so artwork you designed at the dieline's exact dimensions lines up pixel-perfect with each panel.
You can also use the swap action to flip which file goes on which side without re-uploading.
Step · 05
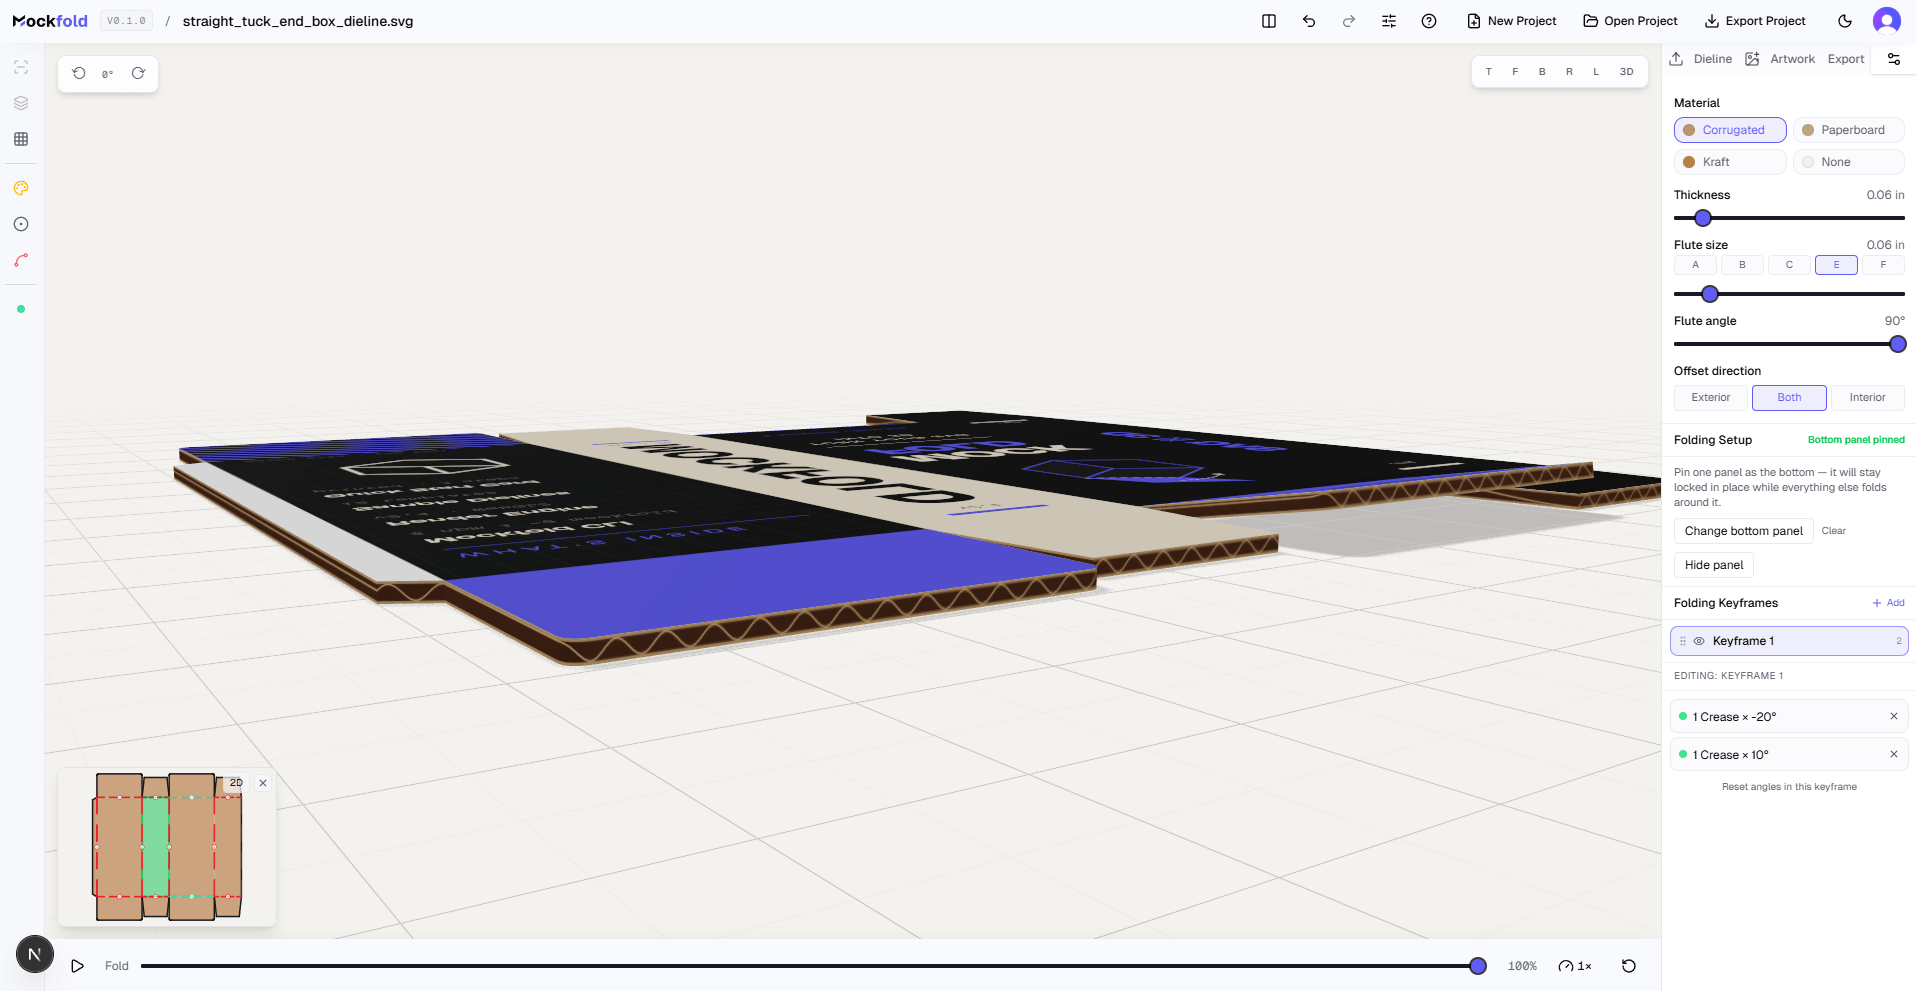
Pick your material
In the same Settings tab where you pinned the bottom panel, the Material section controls how the cardboard looks: corrugated, paperboard, kraft, or none (single-layer). Each one has its own thickness, flute size, and surface texture, and they all affect how light bounces off the box in 3D.
For a typical product box, paperboard at 1mm thickness reads close to retail folding-carton stock. For a shipping box, corrugated at 3mm with a 6mm flute reads B-flute cardboard. The slider previews update live, so adjust until the box feels right.
Step · 06
Frame the shot
Use your mouse or trackpad to orbit around the 3D preview:
- Left-drag (or one-finger drag on trackpad) to rotate.
- Right-drag (or two-finger drag on trackpad) to pan.
- Scroll (or pinch) to zoom.
MockFold automatically remembers your camera position every time you finish a drag or zoom, so you don't need to "save" anything manually. The framing comes back the same when you reopen the project, save the file, or come back to the tab later.
Step · 07
Export the mockup (Pro feature)
You're ready to export your mockup. Open the Export tab in the right sidebar:
- PNG / JPEG for hero shots, social, decks. Pick a custom resolution and DPI for print.
- MP4 / WebM to record the fold animation as a video clip, up to 4K. Pick the length, frame rate, and whether the box folds once or folds-and-unfolds. Great for ProductHunt videos, Twitter/X posts, and pitch decks.
- GLB / glTF / OBJ to drop the 3D model into Blender, Cinema 4D, Maya, Unity, or any AR pipeline. MockFold gets you a folded, textured starting point in seconds, so you can spend your time on lighting, animation, and final polish in your tool of choice.
- HTML viewer for sharing an interactive 3D model with a client over a link.
Common Questions
What file format does MockFold need for dielines?
MockFold reads SVG files. Cuts should be solid black strokes, folds should be red dashed strokes. Stroke styles matter, layer names don't.
Can I use MockFold without Adobe Illustrator?
Yes. Any SVG with the right stroke conventions will work, whether it came from Illustrator, Figma, Affinity Designer, Esko ArtiosCAD, or hand-drawn in code.
Is MockFold free?
The editor is fully free for preview, including importing dielines, folding, applying artwork, and previewing. Exporting watermark-free files and sharing interactive 3D viewers are Pro features.
Can I export to Blender or Cinema 4D?
Yes. MockFold exports to GLB, glTF, and OBJ, the standard formats Blender, Cinema 4D, Maya, Unity, and AR pipelines all import directly. The folded geometry, panel structure, and applied artwork come through, so you can keep working without rebuilding the box from scratch.
Can I export the fold animation as a video?
Yes. The Export panel includes an MP4 / WebM video export that records the fold animation directly from the editor, up to 4K resolution. You can pick the length, frame rate, and whether the box folds once or folds-and-unfolds. The recording renders into an offscreen canvas at your chosen resolution, so the output looks the same regardless of how the editor is sized on your screen.
What's the difference between a dieline and a 3D mockup?
A dieline is the flat 2D blueprint of a box before folding. A 3D mockup is the folded, preview-ready version of what the finished package will look like. MockFold turns one into the other in real time.
What's next
You've got the full loop: SVG in, mockup out. From here, the most useful follow-ups:
- Drop in your own dielines and see them fold using the same workflow.
- Save the project file (
.json) so you can reopen the exact state later or share it with a teammate. - Record the fold as an MP4 or WebM clip from the Export panel (no keyframing needed). Pro feature, great for ProductHunt launches, Twitter/X posts, and pitch decks.
If you get stuck, every editor surface has tooltips, and the contact form reaches a real human.