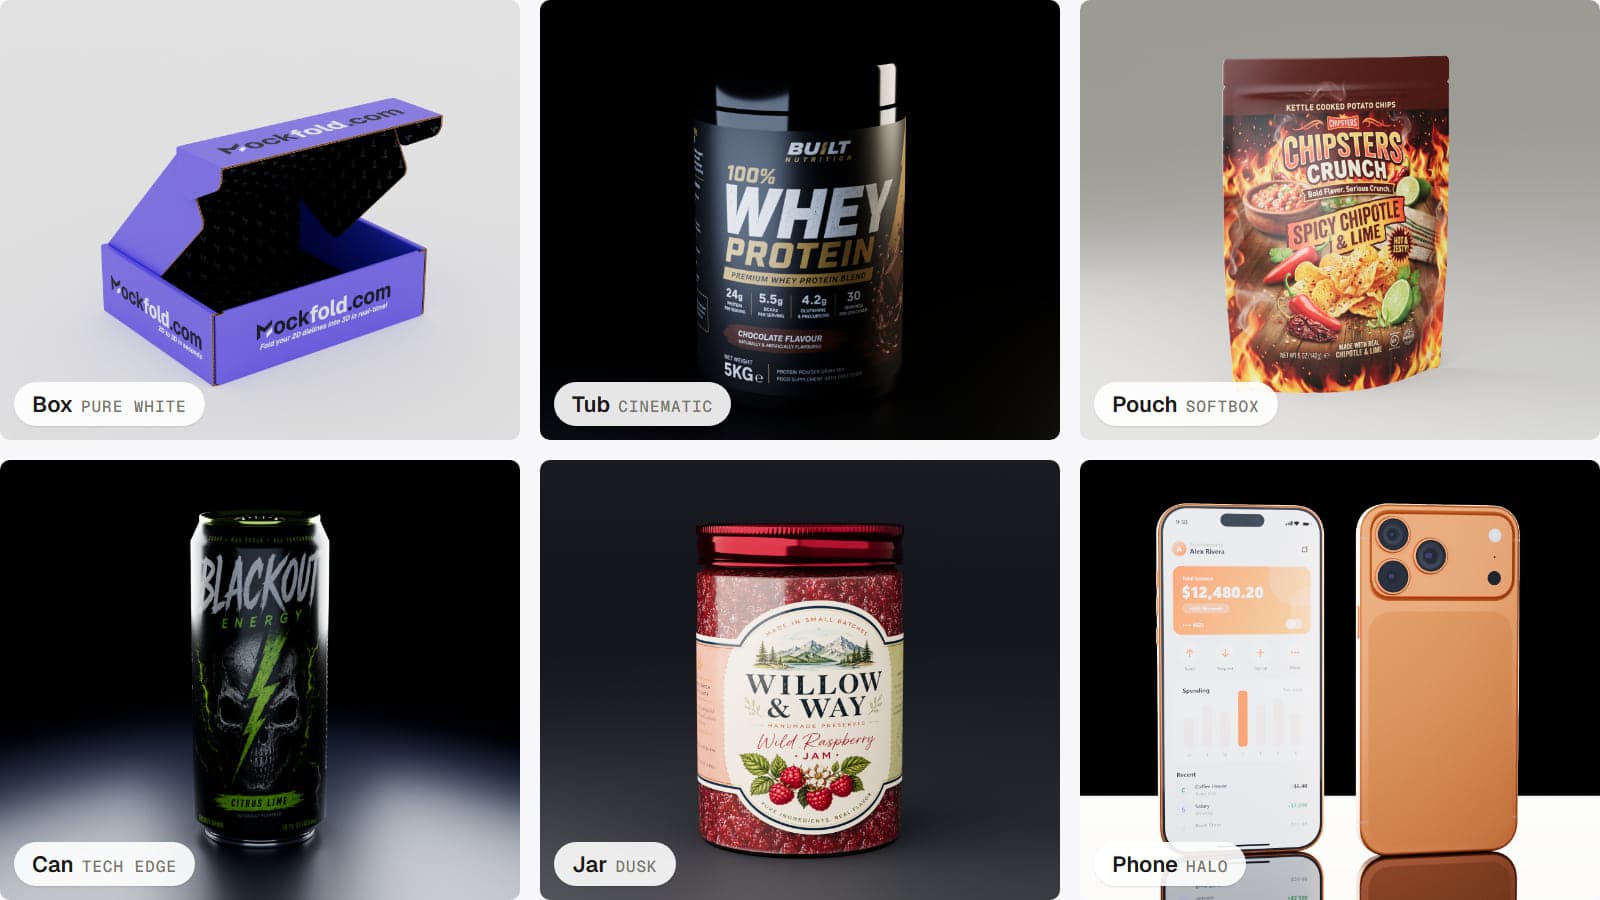
From 3D preview to a finished product image
The normal MockFold editor gives you a quick, interactive view of your design. Render Studio is for the final still image. It uses GPU path tracing, which builds the image by simulating light as it bounces through the scene. That makes softer shadows, reflections and depth of field possible.
Render Studio works with the object you have already made. You do not need to upload the artwork again or rebuild the model in another program. It runs on your own computer's graphics hardware, so your project stays local.
How to use Render Studio
- Open a MockFold editor. Start with the included demo or create your own box, tub, pouch, can, jar or phone mockup.
- Open the Export tab. Choose Open Render Studio.
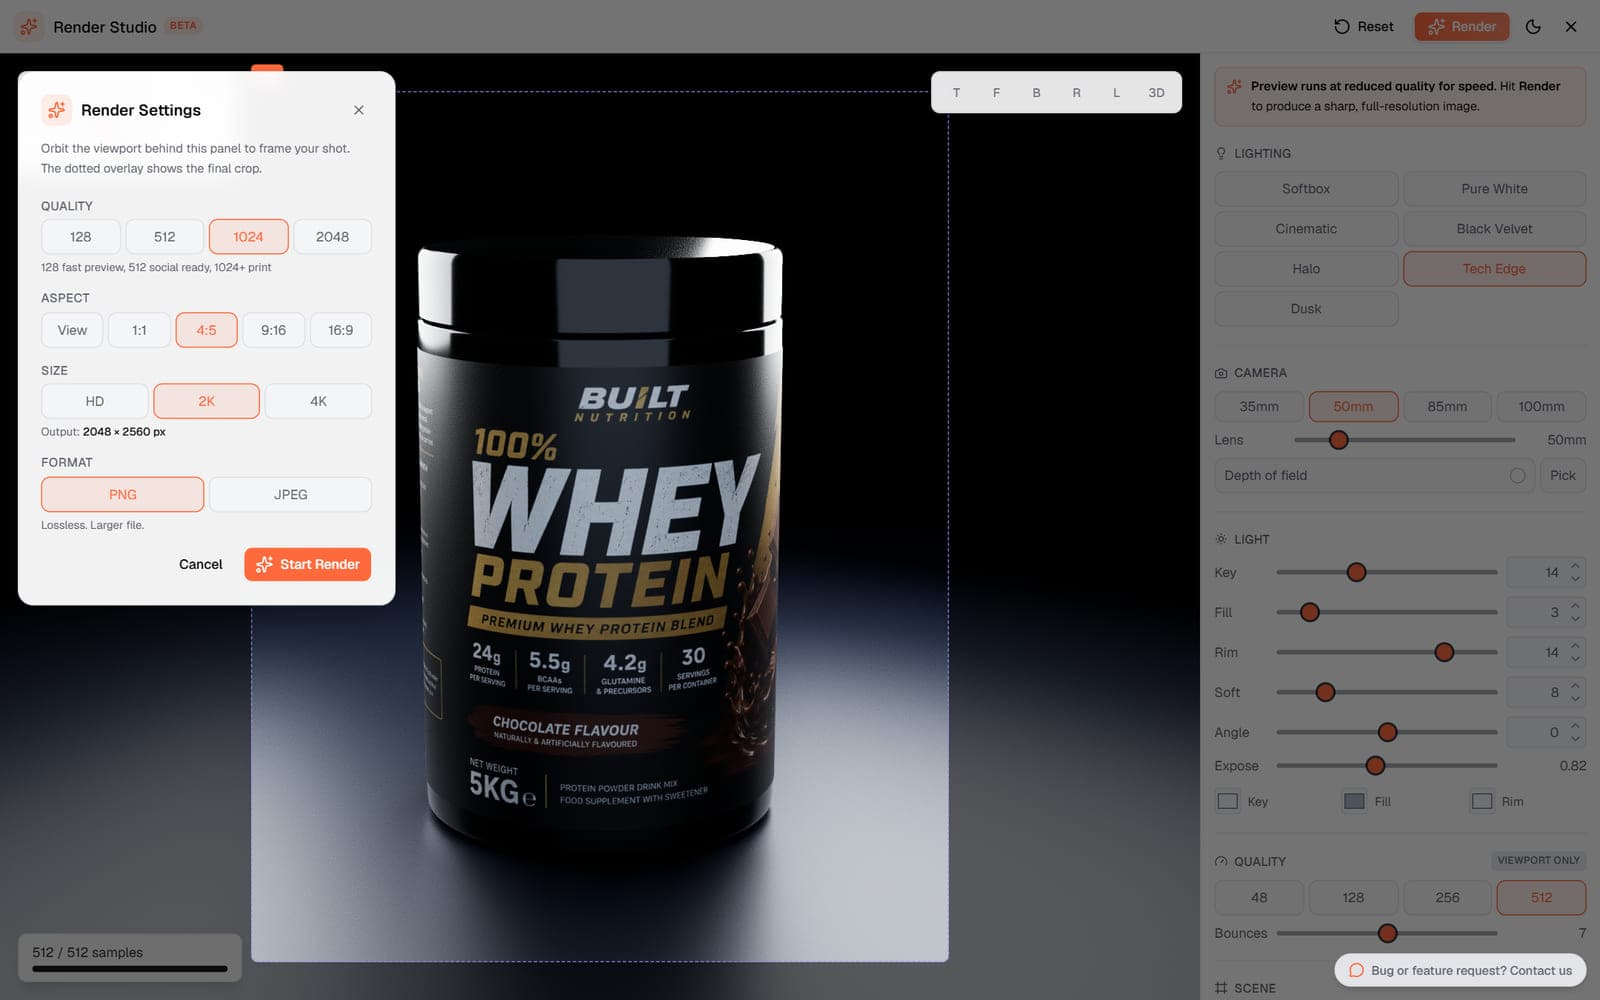
- Pick a lighting preset. Start with one of seven looks and adjust it to suit your design.
- Frame the product. Select your camera angle, lens, focus and image crop.
- Choose the quality and export. Render a still PNG or JPEG at HD, 2K or 4K resolution.
Seven studio lighting looks
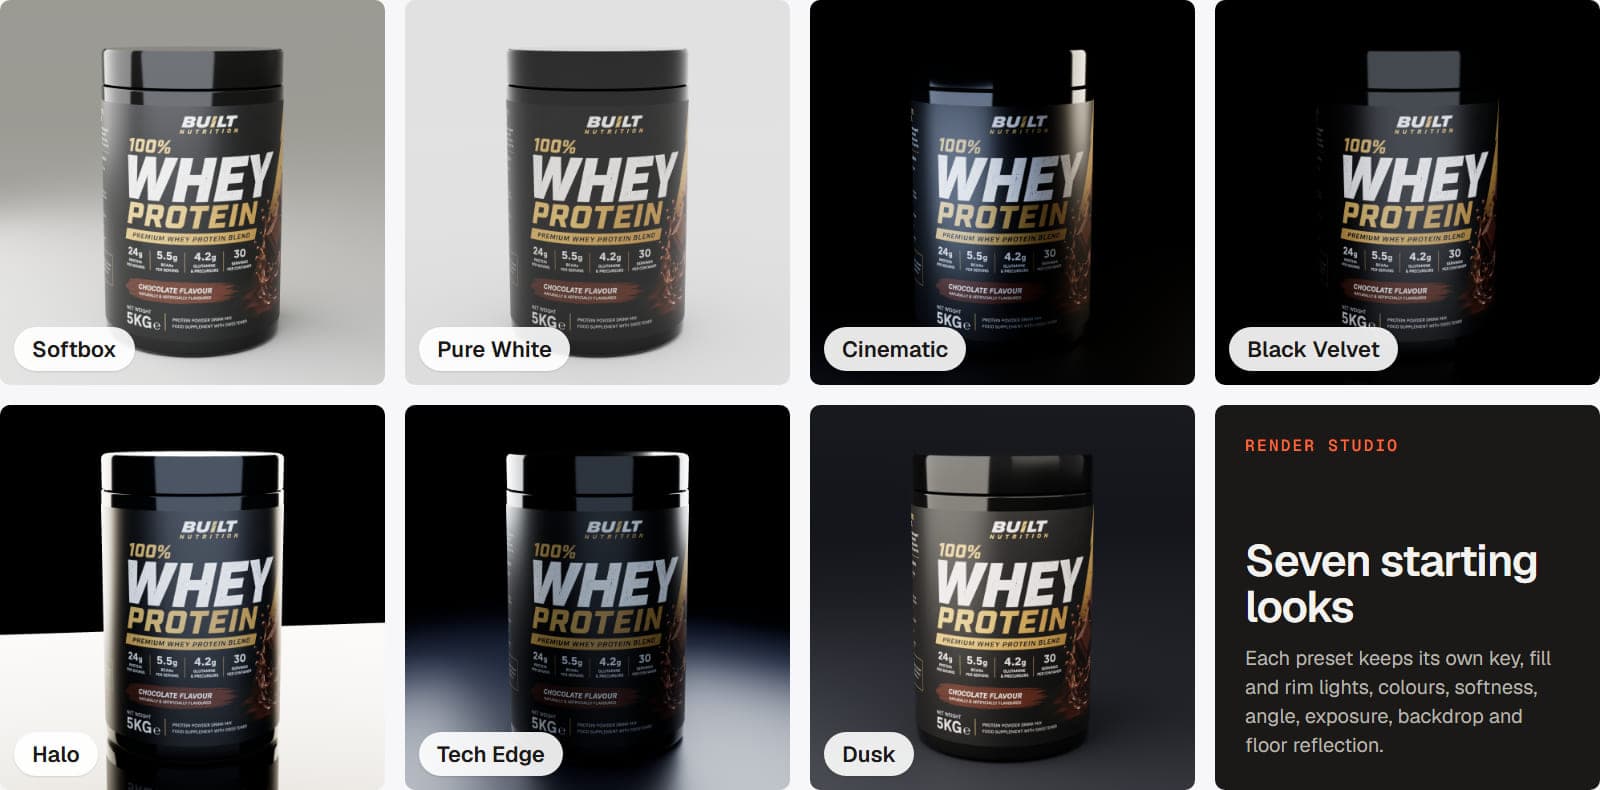
Softbox and Pure White
Softbox gives you a gentle studio setup with fill and rim light. Pure White creates an even, bright backdrop for a clean product image.
Cinematic and Black Velvet
Use a darker background with stronger contrast when you want to highlight a particular shape, finish or reflection.
Halo and Tech Edge
Halo places a warm glow behind the product. Tech Edge uses cooler rim lighting to bring out its outline.
Dusk
Dusk uses a darker grey setting with a low warm light for a quieter product presentation.
Each preset gives you controls for key, fill and rim lights, their colours, softness, angle and exposure. You can also adjust the floor reflection and backdrop colour.
Control the camera and focus
Choose a familiar front, back, top or 3D view, or set a specific horizontal and vertical angle. Try different lens lengths and switch on depth of field when you want the focus to fall on a particular part of the object.
You can choose common image ratios such as square, 4:5 portrait, 9:16 story and 16:9 landscape. A frame guide helps you see the final crop before rendering.
Transparent backgrounds and high-resolution images
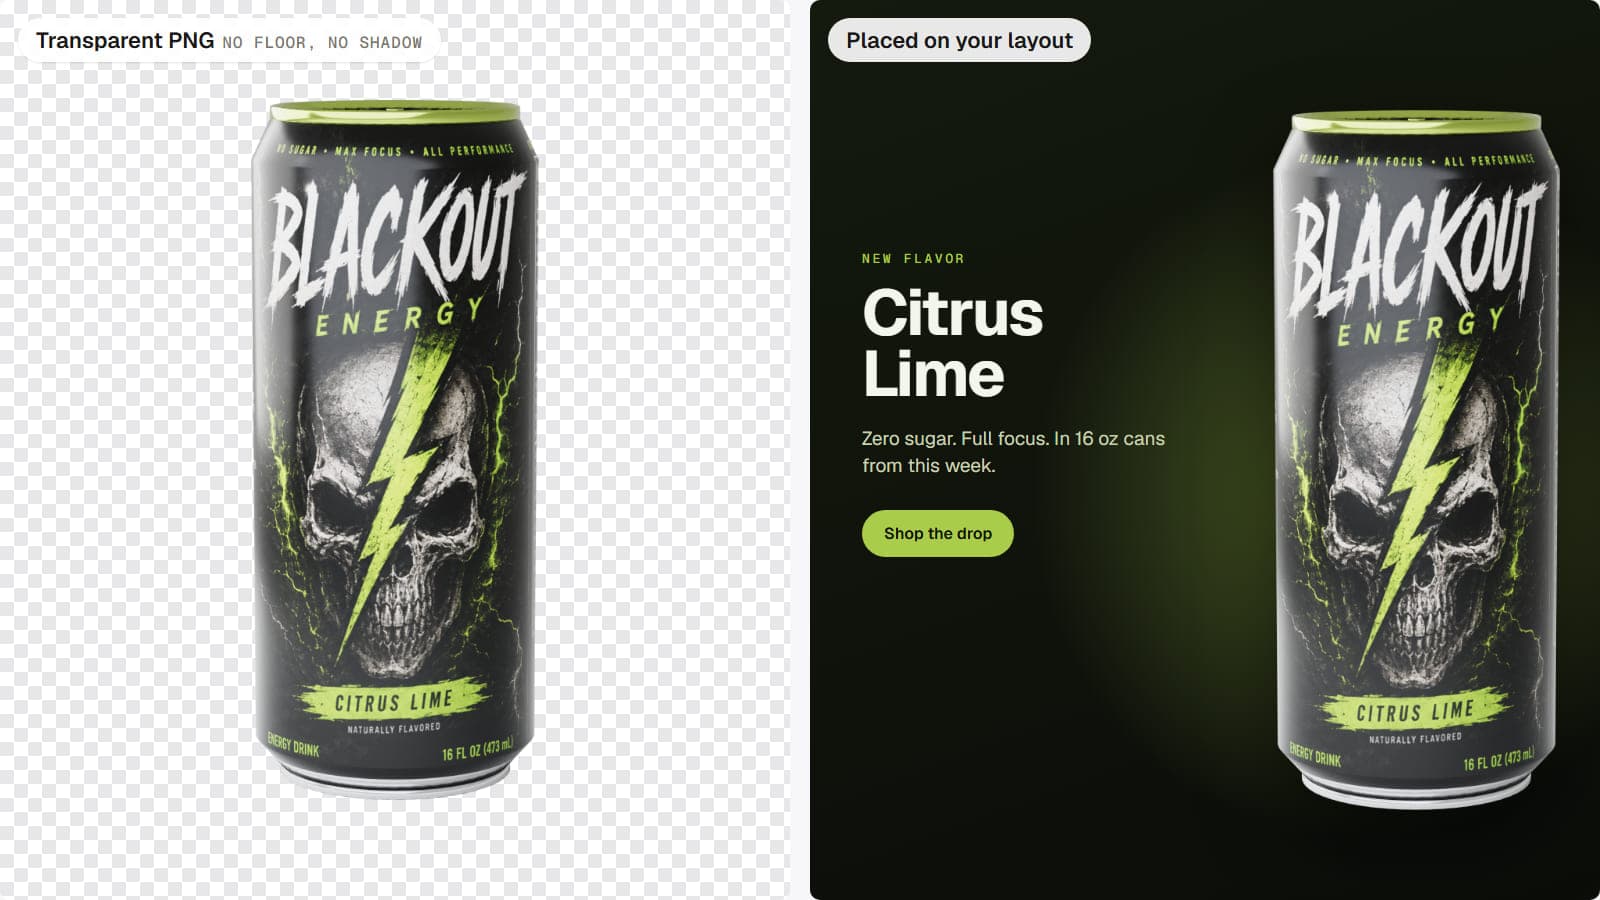
Render Studio exports PNG or JPEG still images in HD, 2K or 4K. A transparent PNG gives you the object on its own, ready to place over another design. When transparency is selected, the floor, its shadow and reflection are removed too.
Render Studio does not create videos or animated turntables. It produces one still image per render.
Made for the materials in your mockup
Render Studio uses the material choices from the editor. That means it can show reflections on a glossy tub label, lighting across a beverage can or light traveling through the glass of a food jar. The Box editor also has an optional Realistic flute setting for corrugated edges, which may need more graphics processing power.
Who uses Render Studio?
- Packaging designers preparing a product presentation.
- Brand teams building visuals for a website or product launch.
- Freelancers making cut-out product images with transparent backgrounds.
- Agencies exploring a few lighting directions before a final client review.
Good to know before rendering
Render Studio is a desktop feature and needs a supported WebGL 2 browser and graphics hardware. Rendering takes time, depending on the scene, image size, sample count and your computer. Keep the tab active while the image renders. The phone editor's custom gradient or image background does not transfer into Render Studio, which uses its own studio backdrop.
Pro unlocks Render Studio for your own projects. Anyone can try it on the included demo project in each editor.
Frequently asked questions
Is Render Studio a separate app?
No. It opens from the Export tab inside each MockFold editor.
Does it work with every editor?
Yes. Render Studio supports the Box, Tub, Pouch, Can, Jar and Phone editors.
Can I render packaging for free?
You can try Render Studio on the included demo projects for free. Rendering your own artwork requires Pro.
Does Render Studio use AI?
No. It uses GPU path tracing to simulate lighting, reflections and shadows.
Can I export a transparent PNG with a shadow?
Transparent export contains the object only. It does not include the studio floor or its shadow.
What image sizes are available?
Choose HD, 2K or 4K and a supported aspect ratio. The maximum output dimension is 3840 pixels.
Can I export a video from Render Studio?
No. Render Studio produces still images. Some MockFold editors offer separate video exports through their standard Export tab.
Does the render happen on MockFold's servers?
No. Rendering uses your computer's graphics hardware and runs locally in the browser.
Try a studio render with your next mockup
Open any editor, load its demo project and see what Render Studio can do with lighting and materials.